How to Start a Vegetable Garden: A Beginner’s Guide
Starting a vegetable garden for the first time involves more than choosing seeds and finding a sunny spot. Soil preparation, timing, plant selection, spacing, watering, and pest management all play a role — and understanding how they connect to each other makes the difference between a productive garden and one that struggles from the start.
This guide covers everything a first-time vegetable gardener needs to know, from picking the right location to harvesting at the right moment. The advice here applies across most climates and garden sizes, with seasonal cues to help you adapt the timing to where you live.
What you grow, where you grow it, and how you care for it through the season all build on each other. Getting the fundamentals right early on tends to make every subsequent step easier.
How to Start a Vegetable Garden From Scratch
Starting a vegetable garden from scratch means building the right conditions before a single seed goes into the ground. The sections below walk through each stage in order — from site selection and soil prep through planting, supporting, watering, feeding, and harvesting — with a troubleshooting section at the end for common first-season challenges. Each step informs the next, so working through them in sequence generally produces more consistent results than jumping ahead.
How to Choose the Right Spot for a Vegetable Garden
Location is the single most important decision when starting a vegetable garden. Most vegetables need a minimum of six hours of direct sunlight per day, and many — including tomatoes, peppers, squash, and cucumbers — perform noticeably better with eight hours or more. A site that looks sunny in early spring may be partially shaded by midsummer as neighboring trees leaf out, so it’s worth observing the spot across different times of day before committing.
Flat or gently sloped ground drains better than low-lying areas where water tends to pool after rain. Avoid placing a garden at the base of a slope or in a spot that stays wet for more than a day or two after rainfall — waterlogged soil suffocates roots and creates conditions where fungal disease spreads quickly.
Proximity to a water source matters more than most beginners anticipate. Dragging a hose across a large yard becomes a daily inconvenience that often leads to inconsistent watering. Placing the garden within reasonable reach of an outdoor spigot or installing a dedicated line from the start makes regular watering significantly more practical.
How to Prepare Soil for a Vegetable Garden
Soil preparation is the foundation of a productive vegetable garden. Most native soils — whether clay-heavy, sandy, or compacted — need amendment before they’ll support consistent vegetable growth. The goal is a loose, well-draining mix that holds enough moisture to sustain plants between waterings but doesn’t stay waterlogged.
Start with a soil pH test. Most vegetables grow well in soil with a pH between 6.0 and 7.0. A basic test kit from a garden center can tell you whether your soil is too acidic or too alkaline, and what amendments — lime to raise pH, sulfur to lower it — are needed. Skipping this step often explains slow germination or stunted growth that isn’t otherwise obvious.
To prepare an in-ground bed:
- Remove all existing grass, weeds, and debris from the area.
- Loosen the soil to a depth of 10–12 inches using a garden fork or tiller.
- Spread 2–4 inches of compost across the surface.
- Work the compost into the top layer of soil thoroughly.
- Rake smooth and water lightly before planting.
Never work soil when it’s wet — tilling or digging compacted, wet soil destroys its structure and the damage can persist for several seasons.
For raised beds, fill with a blend of topsoil, compost, and coarse perlite or sand in roughly equal parts. This mix drains reliably and provides enough organic matter to support most crops through the first season without additional fertilizer at planting.
What Vegetables to Plant First as a Beginner
Choosing the right crops is one of the most practical decisions involved in starting a vegetable garden. Beginners generally do well with vegetables that are tolerant of inconsistent watering, recover from minor damage, and produce over a long window rather than all at once.
Reliable first-season crops include:
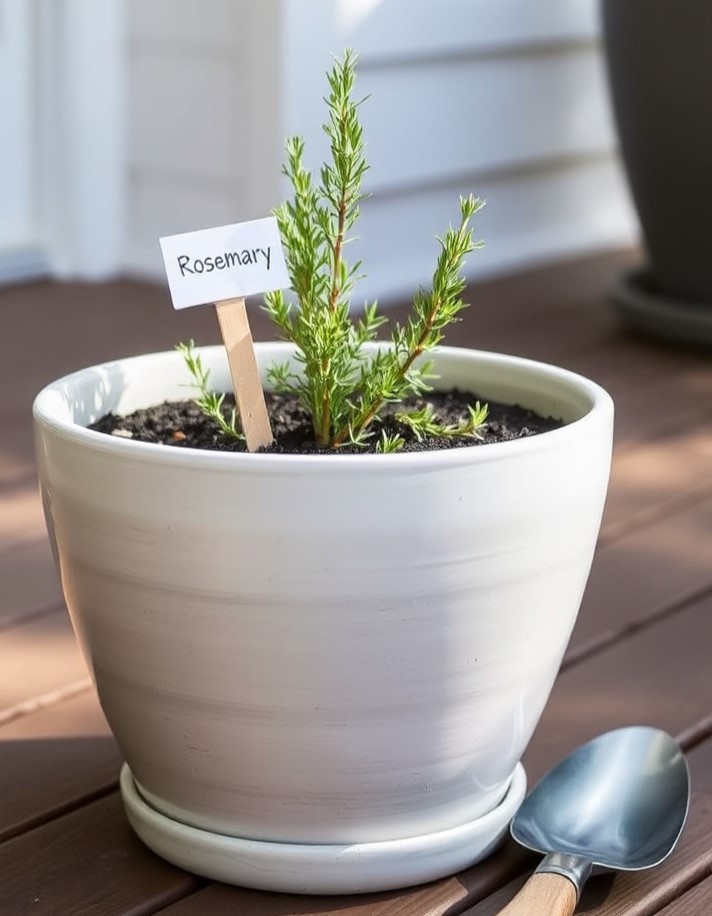
- Tomatoes — widely adaptable, high-yielding, and available in compact varieties suited to small spaces or containers
- Zucchini and summer squash — fast-growing and productive, though they need space to spread
- Green beans — low-maintenance, grow quickly from direct seed, and don’t require staking
- Lettuce and salad greens — can be harvested continuously and tolerate partial shade
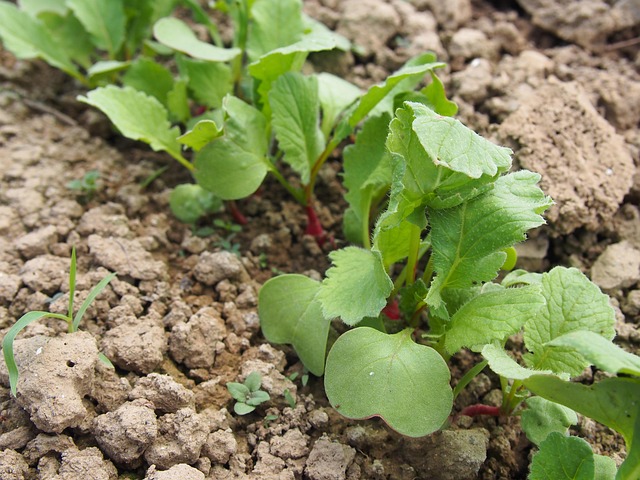
- Radishes — mature in as little as three to four weeks and are useful for filling gaps between slower crops
- Cucumbers — productive in warm weather; train them vertically to save ground space
- Kale and Swiss chard — cold-tolerant, productive over a long season, and forgiving of neglect
Avoid starting with crops that have long growing windows, specific climate requirements, or high maintenance needs — artichokes, celery, and melons are all better suited to gardeners with a season or two of experience.
When to Start a Vegetable Garden Based on Your Season
Timing is one of the most commonly misunderstood parts of starting a vegetable garden. Planting too early — before soil temperatures have warmed sufficiently — often leads to poor germination, slow establishment, and seedlings that sit dormant or rot rather than grow.
Vegetables fall into two broad categories based on their temperature preferences:
Cool-season crops — including lettuce, spinach, peas, kale, broccoli, and radishes — can be planted several weeks before the last expected frost date in your area. These crops germinate in cooler soil and may bolt (go to seed) once summer heat arrives. In mild climates, they can also be planted again in late summer for a fall harvest.
Warm-season crops — including tomatoes, peppers, cucumbers, squash, and beans — need consistently warm soil, typically above 60°F, before planting. Setting these out too early stunts growth even if frost isn’t a risk. Wait until nighttime temperatures are reliably above 50°F before transplanting warm-season seedlings outdoors.
Your local cooperative extension office publishes planting calendars specific to your region and climate zone — these are more reliable than generalized guides and account for local frost dates, soil temperature patterns, and seasonal variation.
How to Start Vegetable Seeds Indoors
Starting seeds indoors gives slow-maturing crops like tomatoes, peppers, and eggplant a head start of four to eight weeks before outdoor conditions are suitable. It also reduces dependence on transplant availability at garden centers, where popular varieties often sell out early in the season.
Use seed-starting mix rather than standard potting soil. Seed-starting mix is finer-textured and sterile — it reduces the risk of damping off, a fungal condition that causes seedlings to collapse at the soil line shortly after germination.
- Fill seed trays or small cells with moistened seed-starting mix.
- Sow at the depth noted on the seed packet — typically two to three times the seed’s diameter.
- Cover trays with a humidity dome or plastic wrap to retain moisture.
- Place under grow lights or in a warm, south-facing window.
- Remove the dome once germination occurs and provide 14–16 hours of light daily.
- Water from the bottom by setting trays in a shallow dish of water — this encourages roots to grow downward.
Before moving seedlings outdoors, harden them off over 7–10 days. Set them in a sheltered spot outside for progressively longer periods each day to acclimate them to outdoor light intensity, wind, and temperature fluctuation. Skipping this step often leads to transplant shock, visible as wilting or leaf scorch in the first few days after planting.
How to Space and Arrange Vegetables in a Garden Bed
Spacing affects airflow, root development, light access, and ultimately how much each plant produces. Crowded vegetables compete for water and nutrients, and reduced airflow between plants creates conditions where fungal diseases like powdery mildew and blight spread more easily.
Follow the spacing guidelines on seed packets or plant tags as a starting point — they’re based on the mature size of each variety, not the size at transplanting. Seedlings that look small and widely spaced at planting will fill in significantly by midsummer.
A few practical spacing principles:
- Place tall crops — corn, staked tomatoes, pole beans — on the north side of the bed so they don’t shade shorter plants as the season progresses.
- Leave 18–24 inches between rows to allow access for watering, weeding, and harvesting without compacting the soil around plant roots.
- Leafy greens tolerate closer spacing than fruiting crops and can be succession-planted in short rows every two to three weeks for a continuous harvest.
- Vining crops like cucumbers, squash, and melons need considerably more ground space than their transplant size suggests — factor in mature spread before placing them.
Sketching a simple diagram before planting helps identify spacing conflicts before they’re committed to the ground.
How to Support and Train Vegetable Plants
Many vegetables need some form of support as they grow — without it, heavy fruit pulls stems toward the ground, airflow decreases, and the risk of rot and disease increases. Planning for support structures at planting time is easier than trying to add them once plants are established and stems are fragile.
Tomatoes are the most common crop that needs staking or caging. Determinate varieties — which grow to a fixed height and ripen fruit all at once — do well in sturdy wire cages. Indeterminate varieties continue growing through the season and generally perform better tied to a tall stake or trained up a trellis, with suckers pinched regularly to keep growth manageable.
Cucumbers and pole beans climb naturally when given a vertical structure to grip. A simple trellis, wire fence, or bamboo teepee works for both. Vertical growing also keeps fruit off the ground, which tends to reduce rot and makes harvesting easier. Squash and melons can be trained vertically too, though large fruit may need individual slings made from netting or fabric to support the weight as it develops.
- Install cages or stakes at transplanting time, not after — adding them later risks damaging established roots
- Use soft ties, fabric strips, or garden velcro rather than wire or string that can cut into stems
- Check ties every few weeks and loosen any that are beginning to constrict stem growth
Peppers and eggplant don’t always need full caging but can benefit from a single stake once they begin carrying heavy fruit loads, particularly in windy locations.
How to Water a Vegetable Garden Consistently
Most vegetables need approximately 1 inch of water per week from rainfall and supplemental irrigation combined. That requirement increases during hot, dry stretches and in sandy or fast-draining soils. In heavy clay soils, where water moves slowly and retention is high, overwatering is more likely to cause problems than underwatering.
Water at the base of plants rather than overhead. Wetting foliage — especially late in the day — creates conditions where fungal disease develops on leaves and stems. A soaker hose or drip irrigation line delivers water directly to the root zone and is more efficient than overhead sprinklers for most vegetable gardens.
Check soil moisture before each watering rather than watering on a fixed schedule. Insert a finger 2 inches into the soil near the base of the plant. If it feels dry at that depth, water thoroughly until the top 6 inches are moist. If it still feels damp, wait a day and check again. Consistent, deep watering encourages roots to grow downward — shallow, frequent watering keeps roots near the surface where they’re more vulnerable to heat and drought stress.
Mulching around plants with 2–3 inches of straw, shredded leaves, or wood chips reduces surface evaporation and can meaningfully extend the time between necessary waterings.
How to Fertilize a Vegetable Garden Without Overdoing It
Vegetables are generally heavier feeders than ornamental plants, and most garden soils — even amended ones — benefit from supplemental fertilization through the growing season. The approach depends on what you’ve already added to the soil and what crops you’re growing.
At planting, a balanced granular fertilizer such as a 10-10-10 formulation provides an even supply of nitrogen, phosphorus, and potassium to support early root and leaf development. Work it into the top few inches of soil rather than applying it directly against plant stems.
Mid-season feeding supports continued production, particularly for heavy-fruiting crops like tomatoes, peppers, and squash. A fertilizer with slightly higher nitrogen content encourages vigorous leafy growth in the first half of the season. Once flowering begins, shift to a formulation with more phosphorus and potassium to support fruit development — too much nitrogen after flowering tends to push foliage growth at the expense of yield.
Always follow label application rates. More fertilizer does not produce proportionally more growth, and excess nitrogen can burn roots and leach into groundwater.
For gardeners who prefer organic options, side-dressing with compost at mid-season is a lower-risk approach. Work a 1-inch layer gently into the soil around each plant, keeping it a few inches clear of the stems.
How to Manage Weeds in a Vegetable Garden
Weeds compete directly with vegetables for water, nutrients, and light. They’re most disruptive in the first several weeks after planting, when vegetable seedlings are still small and establishing their root systems. Staying ahead of weeds early in the season reduces the time spent on them throughout the summer.
Mulching is the most effective passive weed control available to home gardeners. A 2–3 inch layer of straw, shredded leaves, or wood chips applied around transplants after planting suppresses germination of weed seeds near the soil surface and retains moisture at the same time.
For weeds that do emerge, remove them when they’re small — before they flower and set seed. Pull by hand or use a stirrup hoe for larger areas. Avoid cultivating too deeply near plant roots, particularly for shallow-rooted crops like lettuce and squash, as this can damage feeder roots close to the soil surface.
When and How to Harvest Vegetables
Harvesting at the right time affects both the quality of what you eat and how productive the plant remains through the season. Many vegetables — particularly beans, zucchini, cucumbers, and leafy greens — produce more prolifically when harvested consistently rather than left on the plant to fully mature.
General harvest cues by crop type:
- Tomatoes — harvest when fully colored and slightly soft to gentle pressure; fruit left on the vine too long can crack or attract pests
- Zucchini and summer squash — most flavorful at 6–8 inches; left to grow larger, they become seedy and the plant slows production
- Beans — pick when pods are firm and snap cleanly; once seeds begin to bulge inside the pod, flavor and texture decline
- Lettuce and greens — harvest outer leaves continuously rather than pulling the entire plant; this extends the harvest window by several weeks
- Cucumbers — pick before they yellow; overripe cucumbers signal the plant to slow production
- Peppers — can be harvested green or left to ripen to red, yellow, or orange depending on variety; ripe peppers have more sweetness but take longer to reach that stage
Use clean, sharp scissors or pruners rather than pulling or twisting fruit from the plant. Tearing can damage stems and create entry points for disease.
What to Expect in Your First Vegetable Garden Season
Most first vegetable gardens don’t unfold exactly as planned, and that tends to be a normal part of learning how plants respond to your specific soil, microclimate, and growing conditions. Some crops may perform better than expected; others might struggle for reasons that become clearer with experience.
Common First-Season Challenges and How to Handle Them
Yellowing leaves, slow growth, wilting, and poor fruit set are among the most common complaints from first-time vegetable gardeners. Most have identifiable causes and practical solutions.
Yellow leaves can indicate overwatering, underwatering, nitrogen deficiency, or natural aging of lower leaves as the plant matures. Check soil moisture first — it’s the most common cause. If moisture levels seem appropriate, a mid-season fertilizer application often resolves yellowing driven by nutrient deficiency.
Slow or stunted growth early in the season is frequently a soil temperature issue. Warm-season crops planted before the soil has warmed adequately will sit dormant or grow slowly regardless of how much water or fertilizer they receive. Patience — or a layer of black plastic mulch to warm the soil faster — typically resolves the issue.
Blossom drop in tomatoes and peppers occurs when nighttime temperatures fall below 55°F or rise above 75°F, preventing pollination. It’s a climate response, not a disease, and production generally resumes when temperatures stabilize within the acceptable range.
Poor fruit set on squash and cucumbers early in the season is often a pollination issue. These crops produce separate male and female flowers, and female flowers — identifiable by a small fruit at the base — won’t set without pollinator activity. If bee activity in your garden is low, hand-pollinating with a small brush can help.
How to Keep Records and Improve Each Season
One of the most useful habits a vegetable gardener can develop is keeping simple records through the growing season. Notes on what was planted, when it went in, how it performed, and what problems emerged give you a reference point for improving the following year.
Record what worked and what didn’t — specific varieties, spacing decisions, planting dates, and any challenges you encountered. Noting which crops were most productive relative to the space they occupied helps with planning a more efficient layout the following season.
Crop rotation — moving each plant family to a different section of the garden each year — reduces the buildup of soil-borne disease and pest pressure over time. A simple rule is to avoid planting the same crop family in the same location for at least two consecutive seasons. Rotating tomatoes, peppers, and eggplant (all in the nightshade family) away from where they grew the previous year is particularly important for managing soil-borne diseases like early blight and fusarium wilt.
The soil itself improves with consistent care. Adding compost each season, mulching regularly, and avoiding unnecessary tilling gradually builds a more productive growing medium — one that requires less amendment and produces more reliable results as the years accumulate.